Easy Crochet Thor Helmet Pattern Tutorial
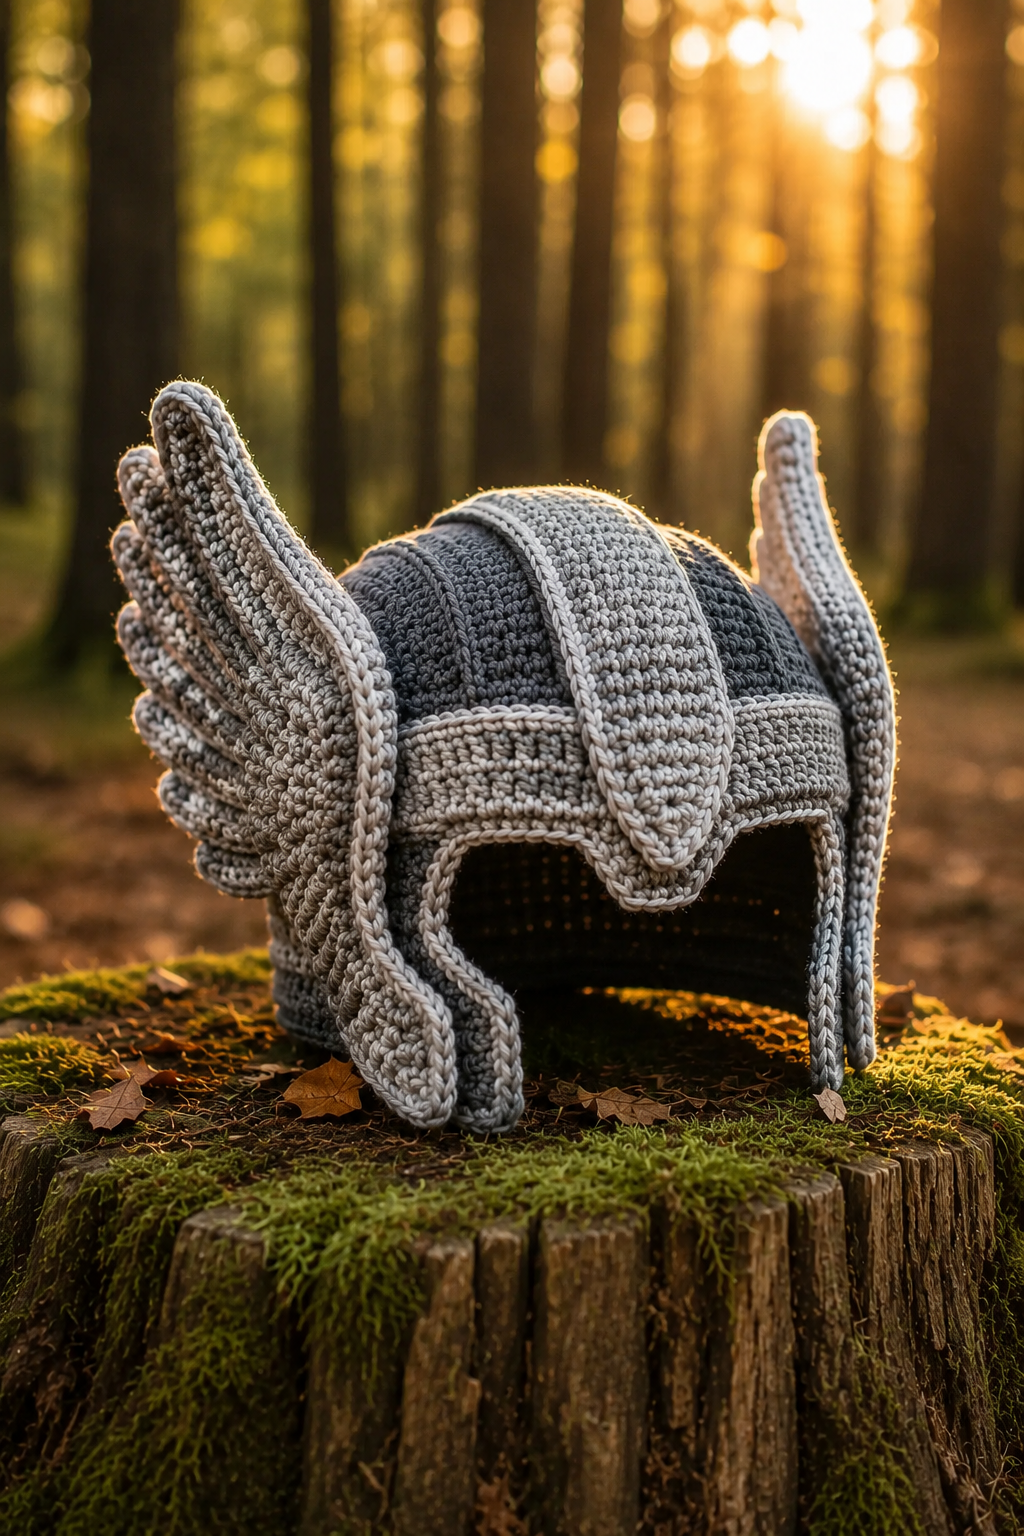
If you’re searching for a fun wearable crochet project that combines creativity with impressive craftsmanship, this Easy Crochet Thor Helmet Pattern Tutorial is a fantastic place to start. Inspired by the iconic winged helmet associated with Norse mythology and classic superhero styling, this handmade crochet helmet is perfect for cosplay events, costume parties, comic conventions, themed photo shoots, or simply displaying as part of your handmade collection.
Unlike many costume accessories that rely on plastic or foam, a crocheted helmet offers warmth, flexibility, and a truly handcrafted appearance. The textured stitches create depth, while the sculpted wings and raised center ridge give the finished project a bold yet elegant look. Best of all, you can customize the fit and yarn choice to suit children, teens, or adults.
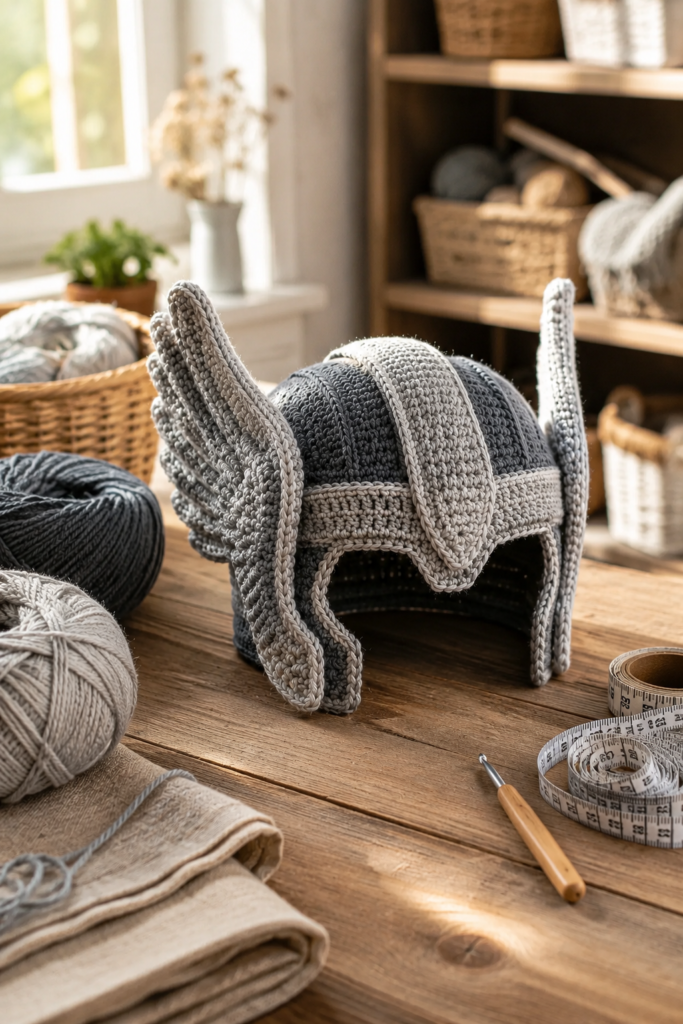
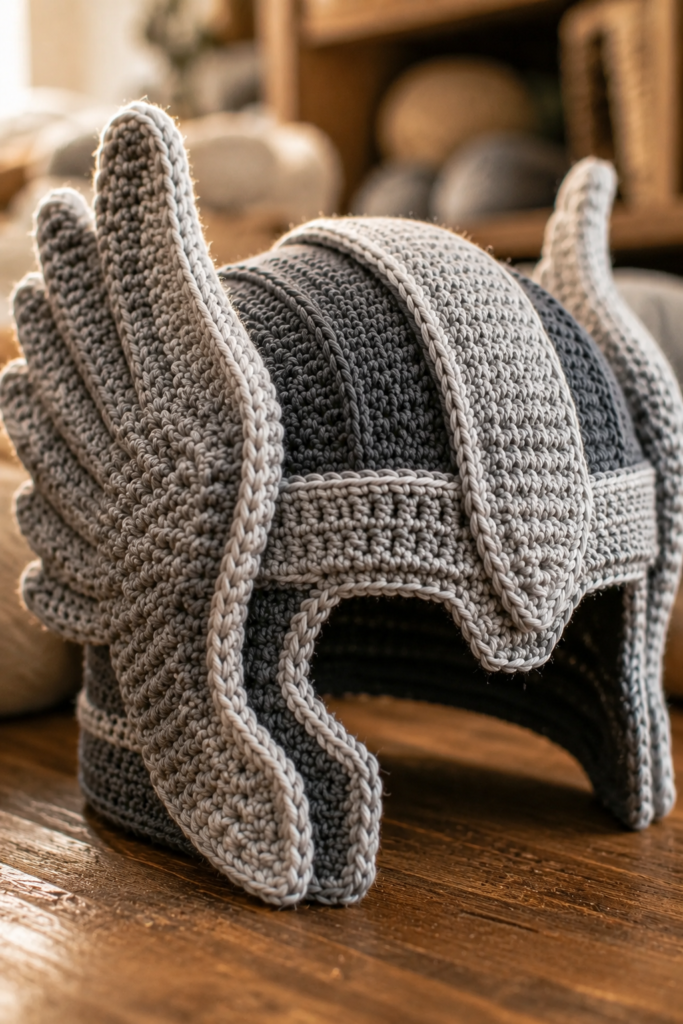
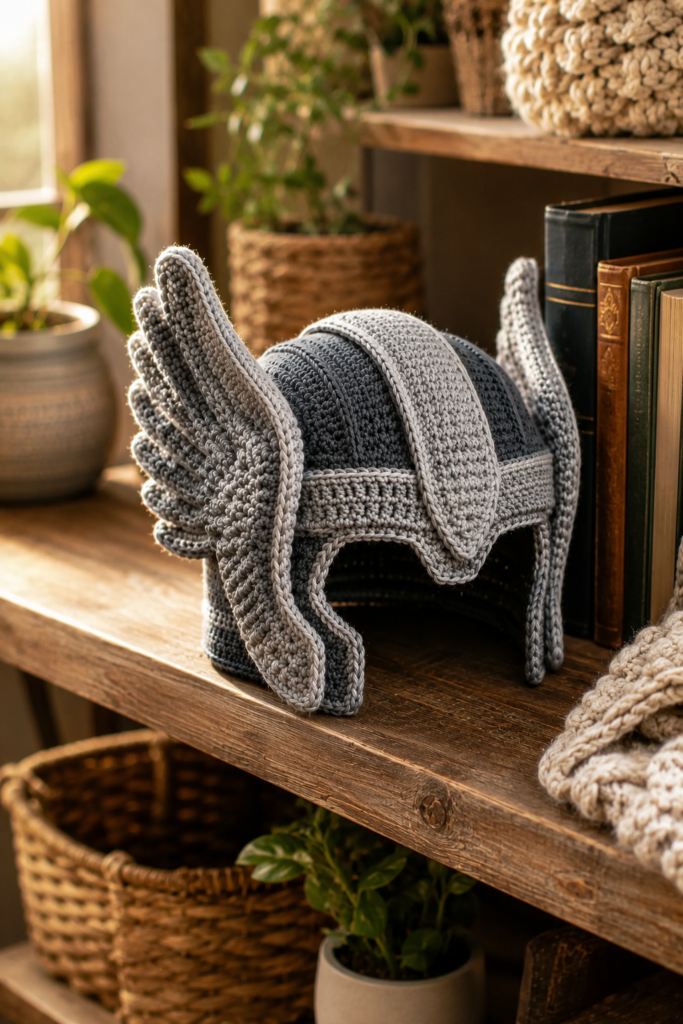
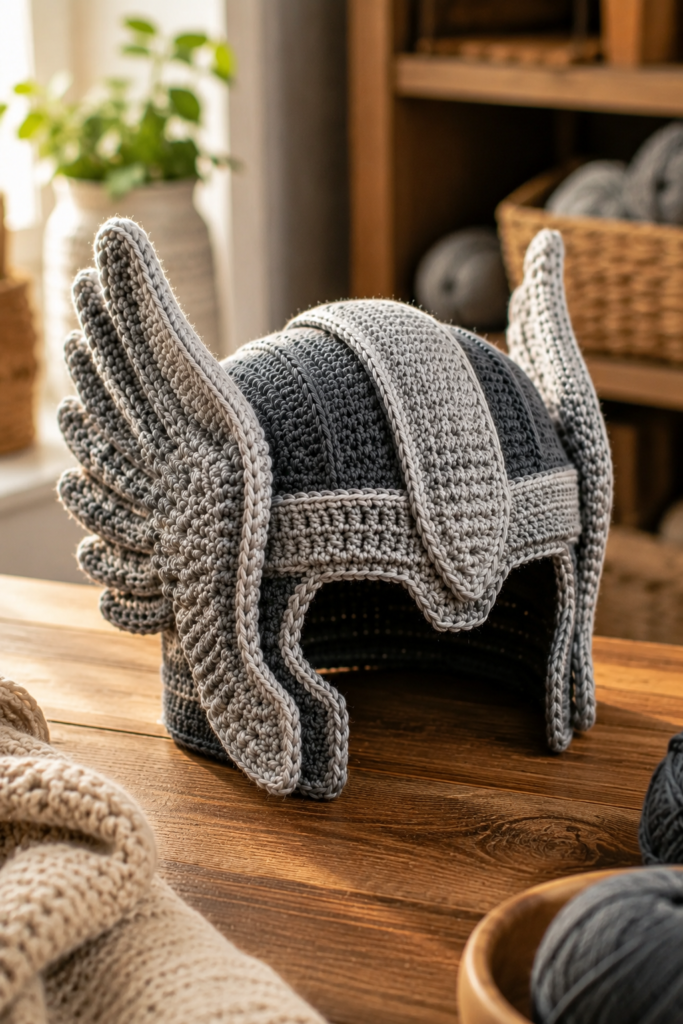
The helmet featured throughout this tutorial is made using medium gray yarn with lighter gray edging that highlights each section beautifully. The large wing panels on either side are carefully shaped to remain symmetrical, creating a balanced design that immediately captures attention. Every stitch contributes to the overall structure while preserving the soft, comfortable feel that only crochet can provide.
Whether you’re making this helmet for yourself, a child who loves imaginative play, or as a thoughtful handmade gift for a fellow superhero fan, this project offers a satisfying combination of practical crochet techniques and creative design.
In this guide, you’ll learn how to select suitable yarn, understand the construction of the helmet, avoid common shaping mistakes, and achieve a polished finish that looks professional. Even if this is your first wearable crochet project, you’ll find plenty of beginner-friendly tips along the way.
Table of Contents
- Introduction
- Why You’ll Love This Project
- Skill Level
- Materials You’ll Need
- Recommended Yarn
- Choosing the Right Crochet Hook
- Understanding the Helmet Construction
- Stitch Techniques Used
- Planning Before You Start
- Beginner Tips
- Expert Advice
- Common Mistakes to Avoid
- Customization Ideas
- Frequently Asked Questions
- Care Instructions
- Final Thoughts
Why You’ll Love This Crochet Thor Helmet
One of the biggest advantages of this project is that it combines practical crochet skills with sculptural shaping. Rather than creating a flat accessory, you’ll build a three-dimensional wearable piece that showcases your craftsmanship.
Some of the benefits include:
- Comfortable to wear
- Soft and lightweight
- Excellent cosplay accessory
- Great conversation piece
- Perfect handmade gift
- Beginner-friendly construction
- Minimal sewing compared to many costume projects
- Durable when made with quality yarn
- Easy to customize for different sizes
- Beautiful display piece even when not being worn
The textured stitches give the helmet a realistic handcrafted appearance while remaining flexible enough for comfortable use.
Materials You’ll Need
Before beginning your project, gather all of your materials so you can crochet without interruptions.
Yarn
Choose a smooth worsted-weight yarn that provides excellent stitch definition.
Recommended colors:
- Medium Gray (Main Color)
- Light Gray (Edging)
- Optional Dark Gray for accents
Avoid fuzzy yarns because they hide stitch definition, making shaping much more difficult.
Crochet Hook
Use the hook size recommended by your yarn manufacturer or one size smaller if you prefer a firmer fabric.
A dense fabric helps the helmet hold its shape better without appearing floppy.
Additional Supplies
- Yarn needle
- Sharp scissors
- Stitch markers
- Flexible measuring tape
- Row counter (optional)
- Blocking pins
- Foam head (helpful for shaping)
Recommended Yarn Choices
Choosing the right yarn has a major impact on the final appearance of the helmet.
Good options include:
- 100% Cotton
- Cotton Blend
- Premium Acrylic
- Cotton Acrylic Blend
Cotton creates crisp stitch definition and excellent structure.
Premium acrylic provides flexibility while remaining lightweight.
Avoid bulky chenille yarn since it reduces stitch visibility and wing definition.
Understanding the Design
Before making any stitches, take a few moments to study the overall construction.
The helmet consists of several distinct sections working together:
Main Helmet
The rounded dome forms the foundation.
It should fit comfortably without excessive stretching.
Raised Center Ridge
The center ridge creates the recognizable Thor-inspired appearance.
It also helps visually divide the helmet into symmetrical sections.
Wing Panels
The wings are the most recognizable feature.
Each wing should:
- Match perfectly
- Maintain equal height
- Curve naturally
- Stay lightweight
- Keep crisp edging
Side Panels
These connect the dome to the lower edge while framing the face opening.
Proper shaping here greatly improves the finished fit.
Understanding Stitch Texture
Texture makes this helmet look realistic.
Consistent stitch tension is far more important than using complicated stitch combinations.
Focus on:
- Even loops
- Consistent height
- Clean increases
- Smooth decreases
- Straight edging
Small inconsistencies become very noticeable on wearable projects.
Choosing the Correct Hook Size
Many beginners automatically follow the hook size printed on the yarn label.
For wearable accessories, that’s not always ideal.
A slightly smaller hook often produces:
- Better structure
- Cleaner stitches
- Improved durability
- Less stretching
- Sharper shaping
Always crochet a small swatch first to evaluate the fabric.
Planning Before You Begin
Professional crochet projects rarely start immediately.
Experienced crocheters spend a few minutes planning.
Ask yourself:
- Is my yarn consistent?
- Have I checked my gauge?
- Do I have enough yarn?
- Are both colors from the same dye lot?
- Have I reviewed the construction?
This simple preparation prevents frustration later.
Beginner Tips
If this is your first wearable crochet project, remember these helpful tips.
Count Every Round
Missing only one stitch early in the project can dramatically affect the final shape.
Use stitch markers frequently.
Don’t Rush the Wings
The wing panels define the entire helmet.
Take your time.
Compare both wings regularly to ensure perfect symmetry.
Maintain Consistent Tension
Try not to crochet tightly on one section and loosely on another.
Even tension creates smooth curves and professional results.
Weave Ends Carefully
Hidden yarn tails make a significant difference.
Secure each end thoroughly without adding unnecessary bulk.
Expert Advice
Professional pattern designers often recommend shaping as you work rather than waiting until the end.
Light blocking between major construction stages helps reveal any small asymmetries before assembly.
It’s also a good habit to place the helmet on a foam head periodically. This allows you to monitor the overall silhouette and ensure the raised center ridge stays centered while the wing panels maintain matching angles.
Taking photos from multiple directions during the project can also help you spot uneven shaping that may not be obvious while crocheting.
Common Mistakes to Avoid
Even experienced crocheters occasionally run into shaping or finishing issues when making wearable accessories. Fortunately, most problems are easy to prevent with a little extra attention.
Uneven Wing Panels
The wings are the most eye-catching feature of the helmet. If one wing is taller or curves differently from the other, the finished helmet can appear unbalanced.
How to avoid it:
- Count every row carefully.
- Use stitch markers at the beginning and end of each row.
- Compare both wings every few rows rather than waiting until they’re finished.
- Block both wings together before attaching them.
Loose Fabric
A loose fabric makes the helmet sag and reduces the sculpted appearance.
Solution:
- Go down one hook size.
- Maintain consistent tension.
- Use a yarn with good stitch definition.
Uneven Edging
The lighter gray border gives the helmet a polished finish. Uneven edging is immediately noticeable.
Solution:
- Crochet at a relaxed pace.
- Keep border stitches evenly spaced.
- Avoid pulling too tightly around curved sections.
Incorrect Sizing
Trying to “guess” the size usually leads to a helmet that’s either too tight or too loose.
Always measure the intended wearer before beginning.
Measure:
- Head circumference
- Ear-to-ear distance
- Forehead depth
Adjust stitch counts gradually instead of making large increases.
Advanced Finishing Tips
Professional-looking crochet projects are usually the result of careful finishing rather than difficult stitches.
Block Before Assembly
Light steam blocking or gentle wet blocking helps each section lie naturally.
Do not over-stretch the fabric.
Shape While Drying
Place the helmet on:
- A foam mannequin head
- An upside-down bowl
- A balloon inflated to the correct size
This helps the dome keep its rounded shape.
Secure Every Tail
Hidden yarn ends prevent unraveling over time.
Weave each tail through multiple stitch directions before trimming.
Check Symmetry
Place the helmet on a flat surface.
Look at it from:
- Front
- Side
- Back
- Top
Small adjustments now create a much more professional finish.
Customization Ideas
One of the best things about this Easy Crochet Thor Helmet Pattern Tutorial is how easy it is to personalize.
Color Variations
Instead of classic gray, try:
- Charcoal & Silver
- Black & Gunmetal
- White & Silver
- Navy & Steel
- Bronze & Gold
Add Elastic
A hidden elastic band inside improves fit for active cosplay events.
Child Version
Reduce:
- Crown rounds
- Side depth
- Wing height
The helmet keeps the same proportions while fitting smaller heads.
Adult Display Piece
Create a larger version and display it on a mannequin head in a craft room or cosplay collection.
Styling Your Finished Helmet
This crochet helmet pairs beautifully with:
- Viking-inspired costumes
- Comic convention outfits
- Halloween costumes
- Cosplay armor
- Fantasy photography
- Handmade display shelves
- Crochet exhibition booths
It also makes an excellent conversation piece for your crochet studio.
Care Instructions
Handmade crochet accessories deserve proper care.
Cleaning
- Hand wash only.
- Use cool water.
- Mild detergent.
- Do not bleach.
Drying
- Roll in a towel to remove excess moisture.
- Reshape while damp.
- Lay flat to dry.
- Avoid tumble dryers.
Storage
Store the helmet on:
- A mannequin head
- Tissue paper
- A clean shelf
Avoid crushing the wing panels.
Keep away from direct sunlight for long-term color preservation.
Frequently Asked Questions
Is this project suitable for beginners?
Yes. Beginners who are comfortable with basic stitches and counting rounds can complete this project with patience.
What yarn works best?
A smooth worsted-weight cotton or premium acrylic yarn gives the best stitch definition and structure.
Can I resize the helmet?
Absolutely.
Increase or decrease the crown gradually while maintaining the overall proportions of the wing panels and side shaping.
Can I sell finished helmets?
Yes, if you’re working from a pattern that permits commercial sales of finished items. Always respect the designer’s licensing terms.
How long does it take to finish?
Depending on your experience, most crocheters can complete the helmet over a weekend or several evenings.
Can children wear it?
Yes. Simply adjust the sizing before beginning and ensure the fit is comfortable.
Does the helmet require stuffing?
No.
The structure comes from the stitch density and shaping rather than fiberfill.
Final Thoughts
This Easy Crochet Thor Helmet Pattern Tutorial is an enjoyable project that combines wearable crochet with sculptural design. The finished helmet showcases beautiful stitch texture, symmetrical wing panels, and a distinctive raised center ridge that instantly evokes a classic Norse-inspired look.
Whether you’re creating it for cosplay, Halloween, a comic convention, imaginative play, or as a handmade gift, the project offers plenty of opportunities to refine your crochet skills while producing something both practical and visually impressive.
Take your time with the shaping, pay close attention to stitch consistency, and don’t rush the finishing details. Those final touches are what transform a good project into one that looks truly professional.
Every completed helmet is a reflection of your craftsmanship, creativity, and patience. Enjoy the process, experiment with colors if you like, and most importantly, have fun bringing this iconic design to life with yarn and a crochet hook.
About StitchNestStudio
At StitchNestStudio, we love sharing detailed crochet tutorials, pattern inspiration, and practical techniques to help makers of every skill level create projects they’re proud to display. From wearable accessories to adorable amigurumi and home décor, our goal is to make crochet approachable, enjoyable, and rewarding.
If you enjoyed this tutorial, be sure to explore our growing collection of crochet guides, beginner resources, and creative pattern ideas. Happy crocheting!